
This Banana Pudding Sheet Cake tastes just like my favorite grocery store version, but better! Soft buttermilk cake is filled with creamy vanilla pudding, fresh bananas, and finished with whipped cream and vanilla wafers for the ultimate Southern dessert.
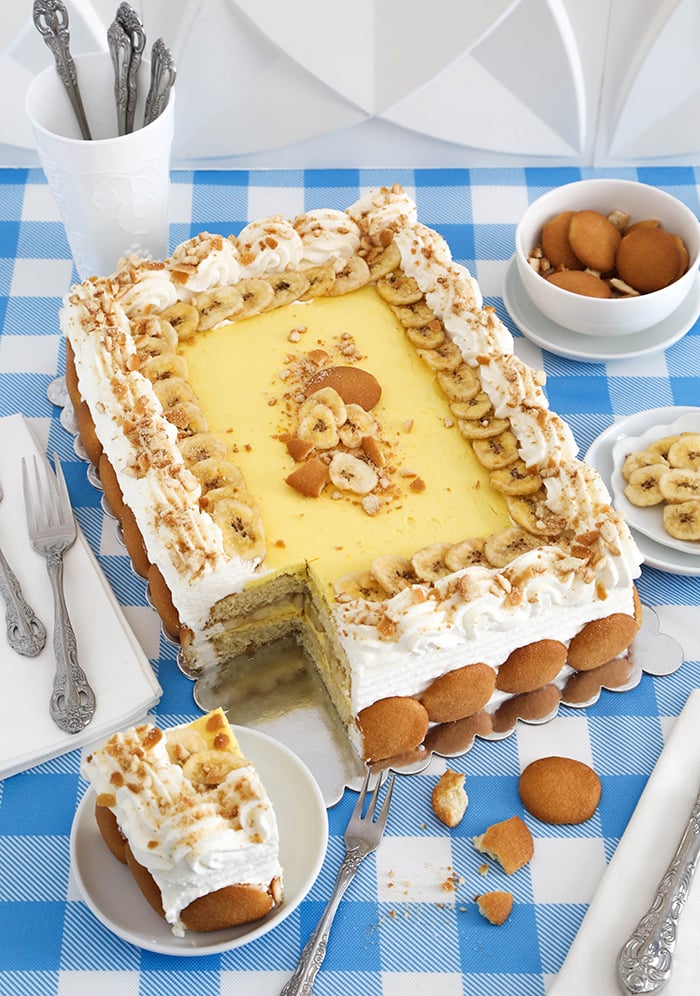
If you live in the American South, then chances are you’ve seen this cake at a local grocery store chain that begins with a P and ends with an x. It’s a good cake, and I will always pick one up when convenience is of paramount importance. But I wanted to see if I could recreate a version at home. I aimed for one less sweet than the deli version, and with more scratch-made flavor. I just knew it would be even more awesome with freshly whipped cream, instead of the bakery’s whipped topping (the kind that comes in a 15 lb. pail).
Well folks, I believe I’ve achieved the Banana Pudding Sheet Cake of my dreams. And maybe yours too. Style-wise, it’s a near ringer for the original, but the flavor is really where it’s at. It’s made with two homemade 9×13 buttermilk cake layers, vanilla pudding filling, fresh bananas, and freshly whipped cream that is just sweet enough. And if you’re looking for a special ending to a summer cookout that feeds 15-20 people, then this sheet cake could be it!
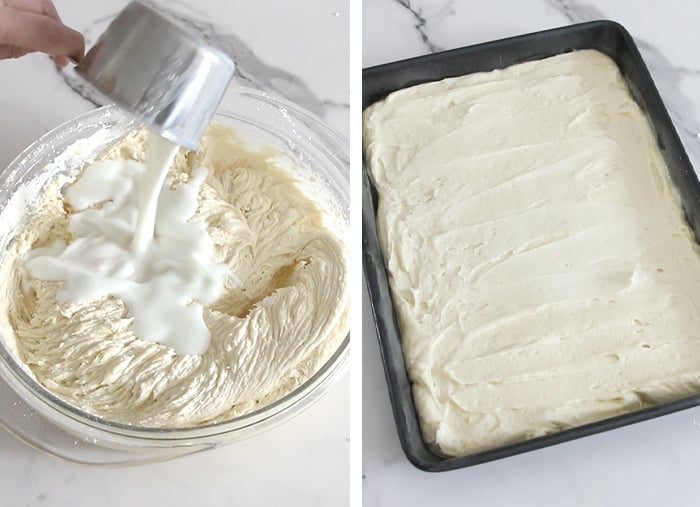
Make the Fluffy Buttermilk Cake Layers
If the cake recipe seems familiar, there’s a good reason. It’s the base for my recent American Flag Sheet Cake. It yields two evenly baked 9×13 layers that are perfect for filling. It’s made with mostly pantry staples, and there are no big surprises mixing up the batter.
First, cream the butter and sugar until light and fluffy, add eggs and vanilla, then alternate the dry ingredients with buttermilk. Easy peasy.
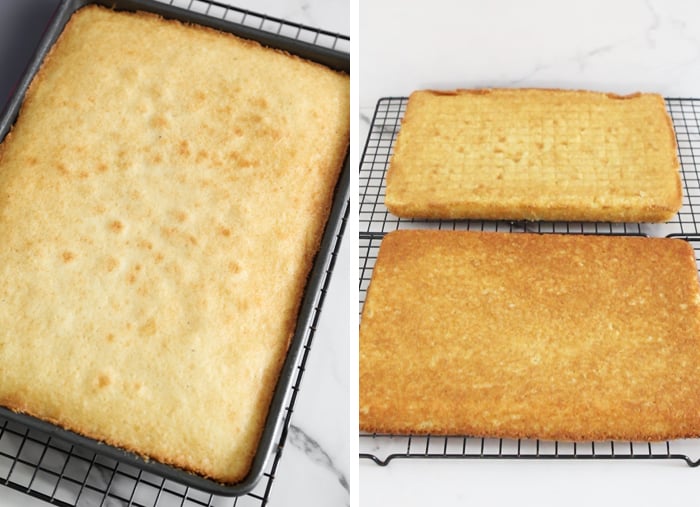
Bake and Cool
Divide the layers between two 13×9-inch pans and bake until golden. The cake is ready when a toothpick tester inserted near the center comes out clean. Allow the cakes to cool completely before assembling.
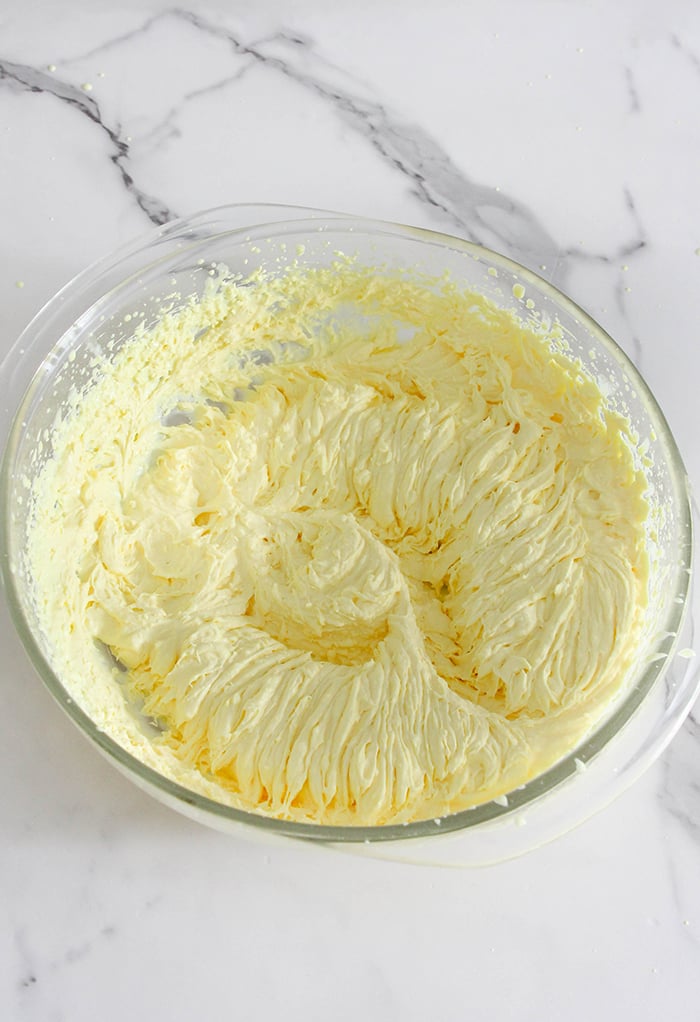
2 Ingredient Vanilla Pudding Cake Filling
Recently, I’ve been loving the quick cake filling that is made with heavy cream and instant pudding mix. It feels like cheating, but the end result tastes scratch-made so I return to it over and over. It’s so simple because you just beat the two ingredients together until fluffy. I used vanilla pudding (with 4 drops of yellow food color), but if you’d like more banana flavor, you could use instant banana flavored pudding. However, the vanilla is more in keeping with the grocery store version’s flavor.
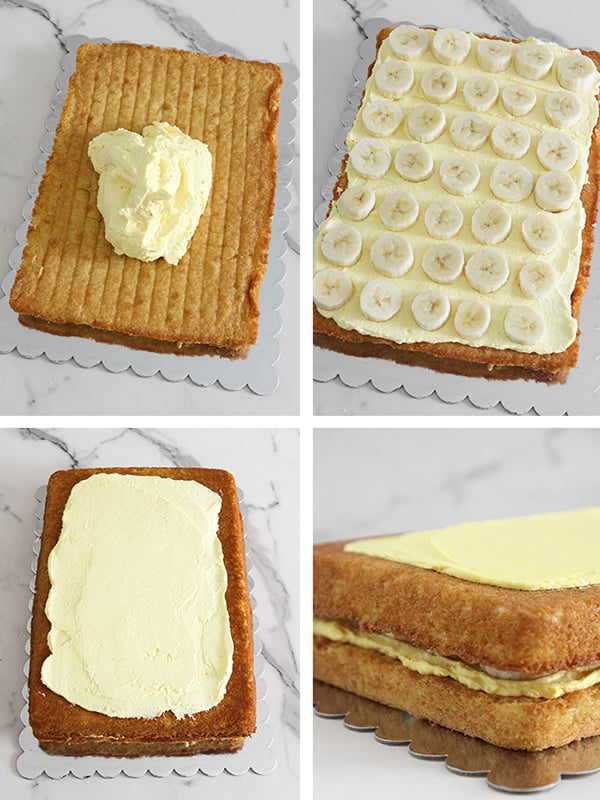
Assemble the Banana Pudding Sheet Cake
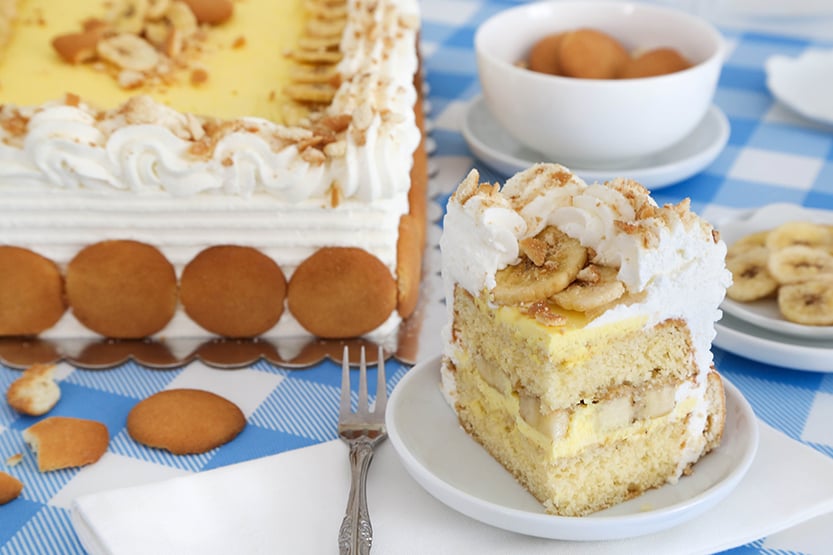
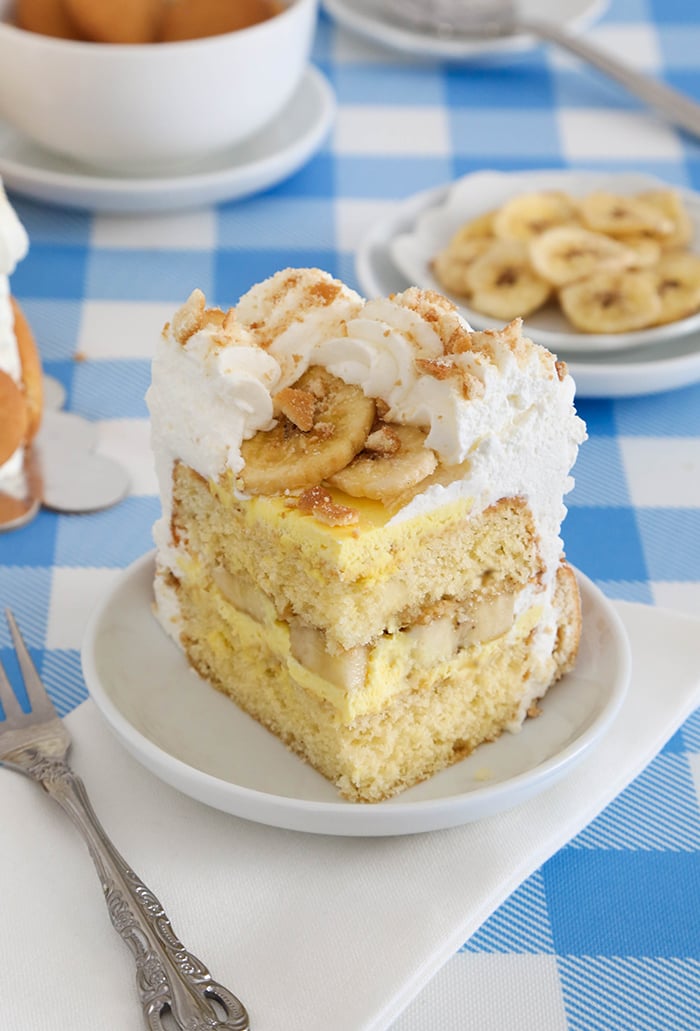
Place about 2/3 of the filling on top of the bottom cake layer. Spread evenly over the entire cake. Next, slice 3-4 medium bananas into 1/4-inch rounds. Arrange the rounds in a single layer over the pudding layer, pressing them in slightly. Top with the second cake layer.
Spread the remaining pudding on the top cake layer. You don’t have to spread it all the way to the edges, just focus on spreading it into a rough rectangle in the center.
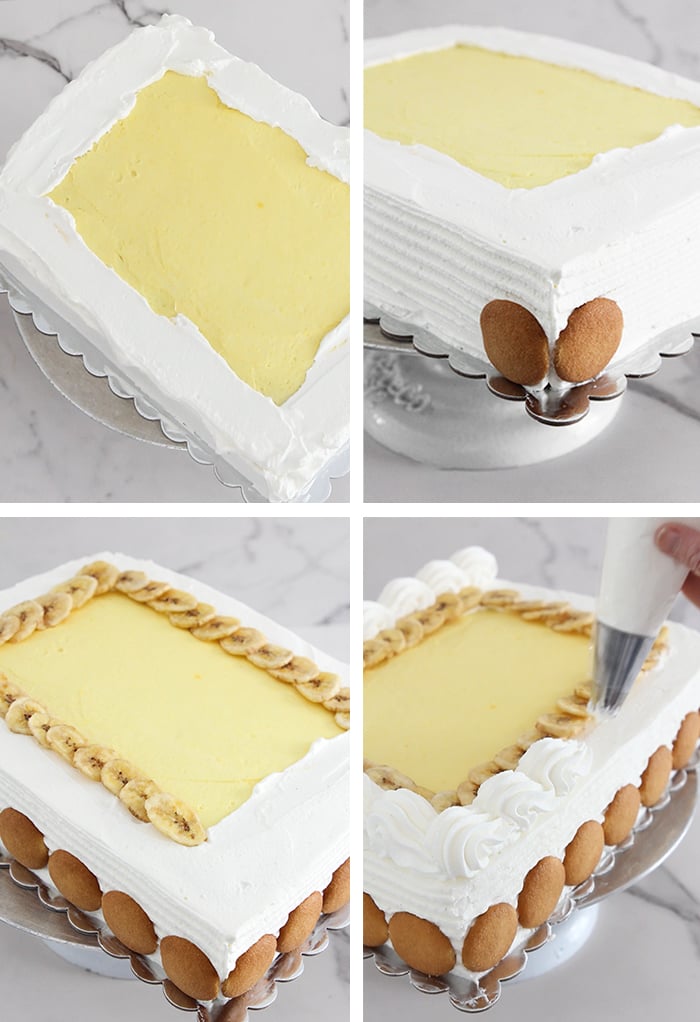
Frost and Decorate
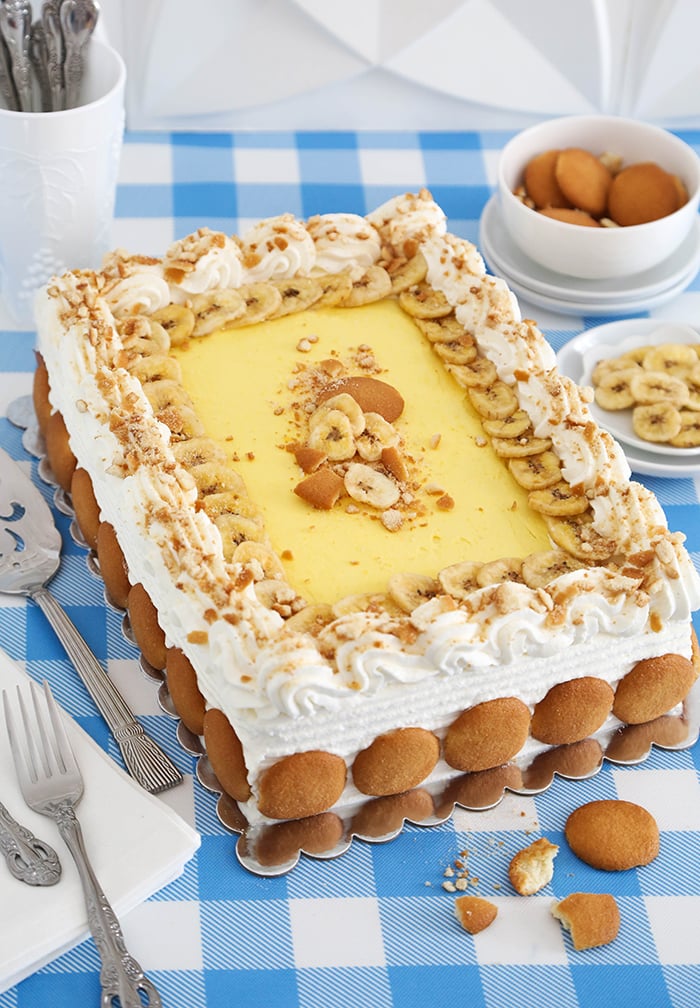
First whip heavy cream with confectioners’ sugar and vanilla bean paste (or extract) until thick and fluffy. Don’t overbeat. The whipped cream should be smooth and of spreading and piping consistency. Cover the sides and top edges of the cake with a thick layer of the whipped cream. The top portion should look like the whipped cream is framing the vanilla pudding in the center. Transfer the leftover whipped cream to a piping bag fitted with a large open star decorator piping tip.
Not pictured (optional): Run a cake comb around the edges of the cake. This action can be seen in the video just before the recipe card. Don’t be too precious about this part being perfect. Most of the ridges will be covered with vanilla wafer cookies.
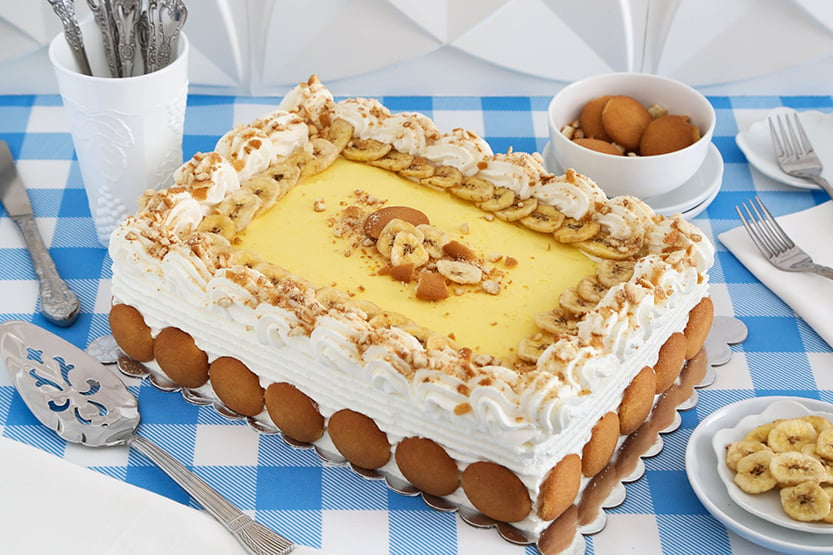
Line the bottom edges of the cake with whole vanilla wafers. Tile dried banana chips in a rectangle around the edges of the center pudding layer. Then, use the reserved piping bag of whipped cream to pipe a fat shell border on the top edge of the cake.
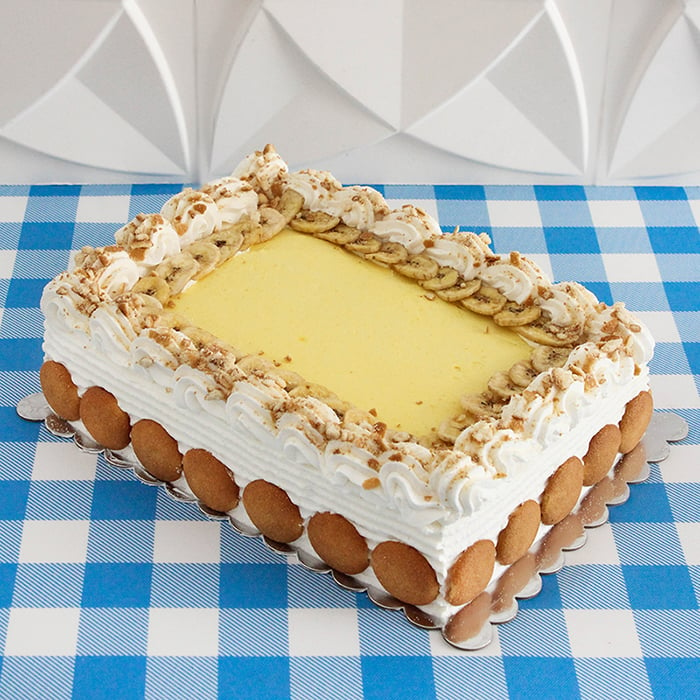
Additional Garnishes and Toppings
Add crushed vanilla wafer crumbs around the top edge of the cake. As for the center, it is the perfect blank canvas for a ‘Happy Birthday’ message, or whatever occasion you happen to be celebrating. Since we didn’t have any special occasions to celebrate, I opted for a few banana chips, vanilla wafers and crumbs for a center decoration.
Make Ahead & Storage
This is a wonderful make-ahead dessert because the assembled cake improves with a little time in the refrigerator. Once it’s chilled for 4-6 hours (or overnight), the cake layers become even softer and the flavors marry together.
- You can bake the buttermilk cake layers up to 2 days in advance. Once completely cooled, wrap each layer tightly in plastic wrap and store in the refrigerator.
- The vanilla pudding filling, however, should be made just before assembling the cake. Because it’s whipped with heavy cream, it thickens very quickly and doesn’t spread as smoothly if prepared ahead of time.
- After the cake is assembled, refrigerate until set, about 4 hours or until ready to serve. It will keep well in the refrigerator loosely covered for up to 3 days. The bananas may darken slightly after the second day, but the flavor remains delicious.
- If you’d like the garnish to stay extra crisp, add the vanilla wafer cookies and crushed cookie crumbs shortly before serving. However, I really enjoy the softened cake-like texture the cookies take on with refrigeration.
I cannot wait to make this Banana Pudding Sheet Cake for our next big cookout. I can just see it sitting at the end of a long line of chafing dishes full of barbecue, mac and cheese, baked beans – all the fixings. It’s so fluffy and light, which makes it an ideal ending to a rich meal.
Related Recipe: Banana Pudding in a Sack
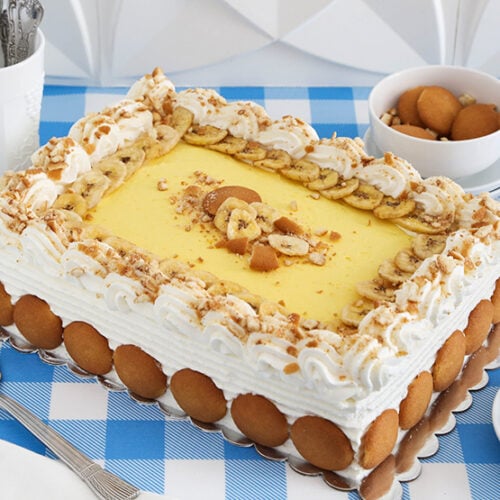
Banana Pudding Sheet Cake

Equipment
- Two 13×9-inch cake pans
- Large open star decorating tip Ateco 828
- Piping bag
Ingredients
Buttermilk Cake Layers
- 2 2/3 cups all-purpose flour
- 1/4 cup cornstarch
- 1 1/2 teaspoons baking powder
- 1/2 teaspoon baking soda
- 1 teaspoon fine grain sea salt
- 1 cup unsalted butter room temperature
- 2 cups granulated sugar
- 3 large eggs room temperature
- 1 teaspoon vanilla bean paste or vanilla extract
- 1 cup whole buttermilk
Vanilla Pudding Filling
- 2 1/4 cups heavy whipping cream chilled
- 3.4 oz. instant vanilla pudding mix 1 small box
- 4 drops yellow food color optional
- 3-4 medium firm-ripe bananas sliced into 1/2-inch rounds
Whipped Cream Frosting and Decoration
- 3 cups heavy whipping cream
- 2/3 cup confectioners’ sugar
- 1 teaspoon vanilla bean paste or vanilla extract
- 30 whole vanilla wafers such as Nilla Wafers
- 35-40 dried banana chips
- 1/4 cup crushed vanilla wafer crumbs about 10 cookies
Instructions
Make the Cake Layers
- Preheat the oven to 350°F. Coat two 13×9-inch cake pans with flour-based baking spray, or grease and flour the pans.
- In a large bowl, whisk together the flour, cornstarch, baking powder, baking soda, and salt. Set aside.
- In the bowl of an electric mixer, beat the butter and granulated sugar until light and fluffy, about 3 minutes.
- Beat in the eggs one at a time, mixing well after each addition. Scrape down the bowl and beat in the vanilla.
- Add one-third of the flour mixture, then half of the buttermilk. Repeat with another third of the flour and the remaining buttermilk. Finish with the remaining flour mixture, mixing only until incorporated.
- Divide the batter evenly between the prepared pans and smooth the tops.
- Bake for 20-22 minutes, or until lightly golden and a toothpick inserted in the center comes out clean.
- Cool in the pans for 10 minutes. Turn the cakes out onto wire racks and cool completely.
Make the Vanilla Pudding Filling
- In the bowl of an electric mixer fitted with the whisk attachment, combine the heavy whipping cream, instant pudding mix, and yellow food color, if using.
- Beat on medium-high speed until thick, fluffy, and spreadable, about 2-3 minutes.
- Place one cake layer on a serving board or platter.
- Spread about two-thirds of the pudding filling evenly over the cake.
- Arrange the banana slices in a single layer over the filling, pressing them in gently.
- Top with the second cake layer.
- Spread the remaining pudding filling over the center of the top cake layer, leaving about a 2-inch border around the edges.
Make the Whipped Cream Frosting
- In the bowl of an electric mixer fitted with the whisk attachment, beat the heavy whipping cream, confectioners' sugar, and vanilla until thick enough to spread and pipe. Do not overbeat.
- Cover the cake's sides with a thick layer of the whipped cram and a thinner layer on the outer border of the top, leaving the pudding visible in the center.
- If desired, run a cake comb around the sides of the cake to create decorative ridges.
- Place the remaining whipped cream into a piping bag fitted with a large open star decorating tip (Ateco 828).
Decorate
- Press whole vanilla wafers around the bottom edge of the cake. You should be able to fit 7 cookies on each long edge and 5 on each short edge.
- Arrange dried banana chips in a rectangle around the edge of the pudding layer.
- Pipe a shell border around the top edge of the cake using the whipped cream in the piping bag.
- Sprinkle crushed vanilla wafer crumbs over the whipped cream border.
- Decorate the center with additional banana chips and vanilla wafers, or leave it plain for a celebration message.
- Refrigerate the cake for at least 4 hours before serving. For the best flavor and texture, chill overnight. Let stand 15 minutes at room temperature before slicing and serving.
Notes
- The cake layers can be baked up to 2 days in advance. Wrap tightly and store in the refrigerator.
- Prepare the pudding filling just before assembling the cake. It thickens quickly and does not spread as easily if made ahead.
- The assembled cake keeps well, covered, in the refrigerator for up to 3 days.
