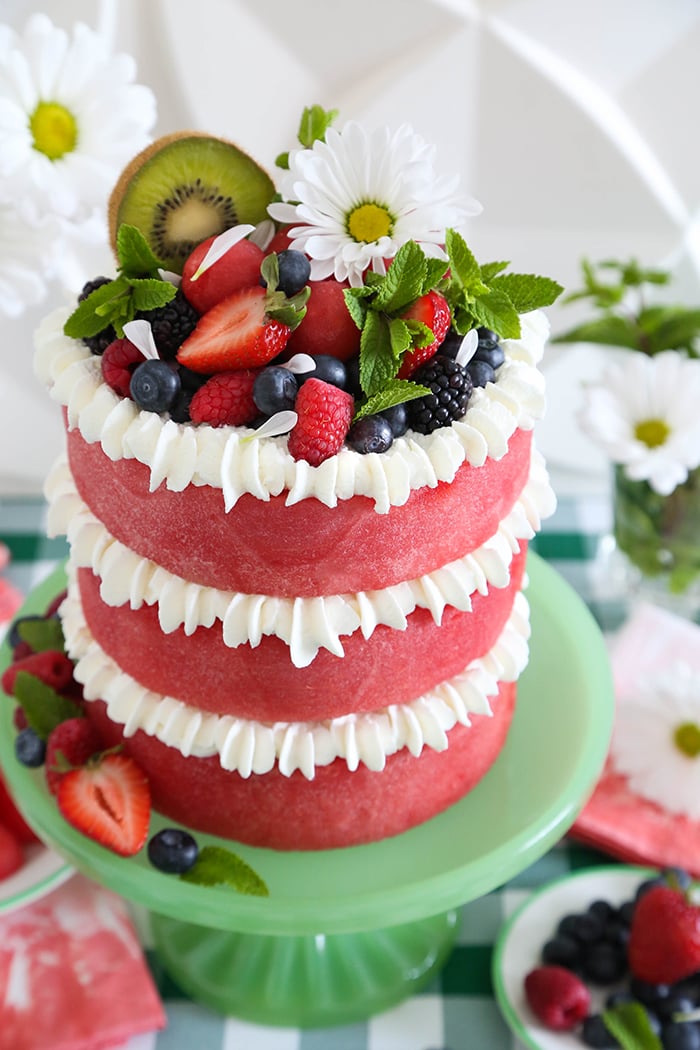
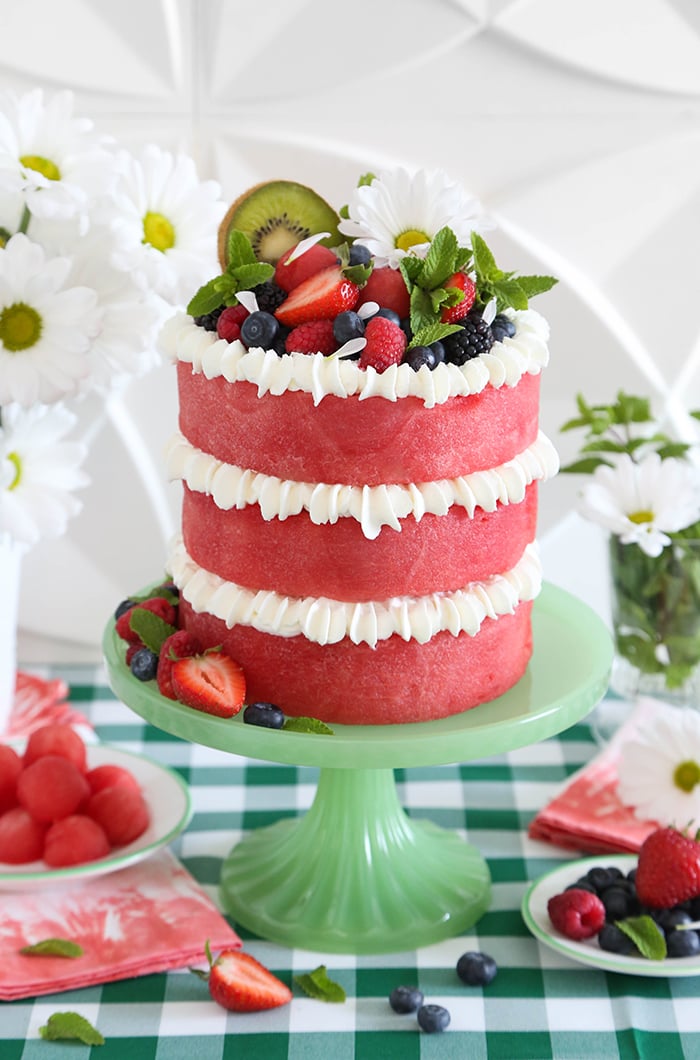
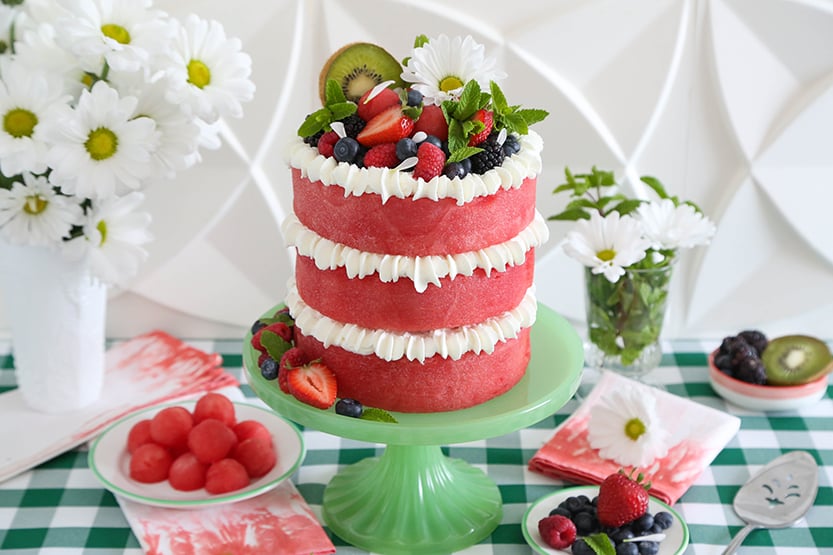
This refreshing Layered Watermelon Berry Cake is part fresh fruit platter, part no-bake summer dessert, and part edible centerpiece! Thick watermelon layers are filled with whipped cream and fresh berries, then finished with a colorful crown of summer fruit.
Here’s the easiest cake you’ll no-bake this summer! This Layered Watermelon Berry Cake was inspired by a previous watermelon cake here on the blog – my OG Fresh Watermelon Cake recipe from more than a decade ago! That one has been such a reader favorite that I knew there was room for another version. This torte-style cake adds more flavor and texture with whipped cream and juicy berries. It’s a fresh fruit dessert that’s surprisingly simple to make, and it will look absolutely beautiful on your table.
It’s perfect for lighter summer fare, and I love it for entertaining because it’s naturally gluten-free. You can easily make it dairy-free with coconut whipped cream and other plant-based whipped toppings. It’s so versatile!
The Secret to a Sturdy Watermelon Cake
After testing different styles of watermelon cakes over the years, I’ve learned that with a ‘torte’ style cake – like this one – structure is everything. Watermelon is naturally heavy with juices, so keeping the layers stable and secure requires a few simple tricks.
First, drying the watermelon rounds with paper towels helps the whipped cream adhere better. Never skip this step. Second, firm-ripe blueberries create tiny supports between the layers, which keeps the cake stable without skewers or supports. No mushy berries allowed. Finally, assembling the cake the same day it is to be served is essential for the freshest flavor and best presentation. Luckily, it comes together pretty quickly!
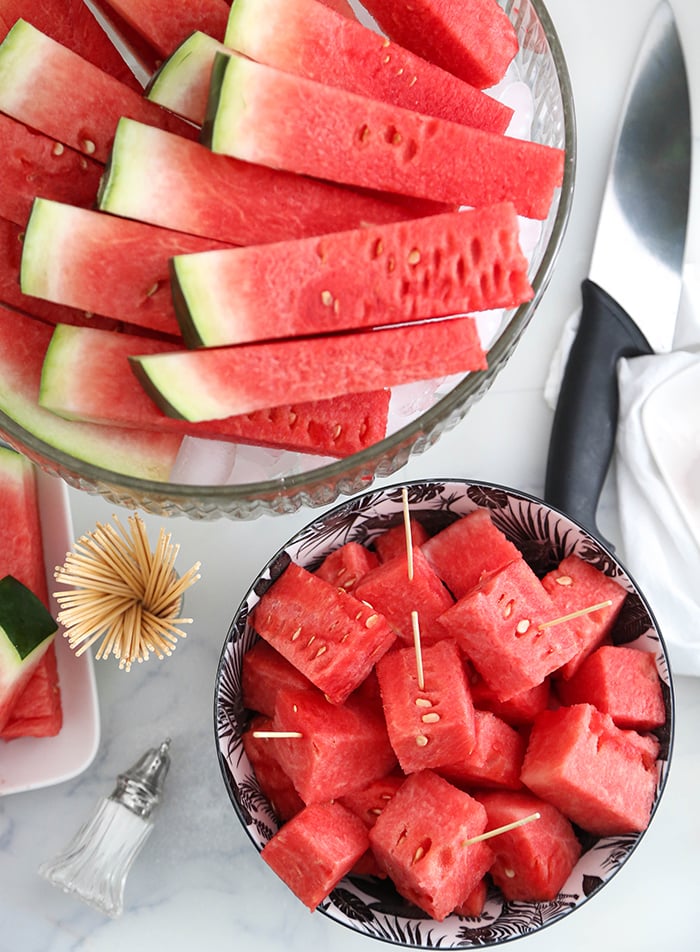
Before we get started on the ‘cake’ – if you’re looking for an all-purpose watermelon-cutting guide, then check out my HGTV article. How to Cut a Watermelon, is a step-by-step guide for easy slicing and cubing methods. ‘Tis the season!
Cut the Watermelon Into Layers
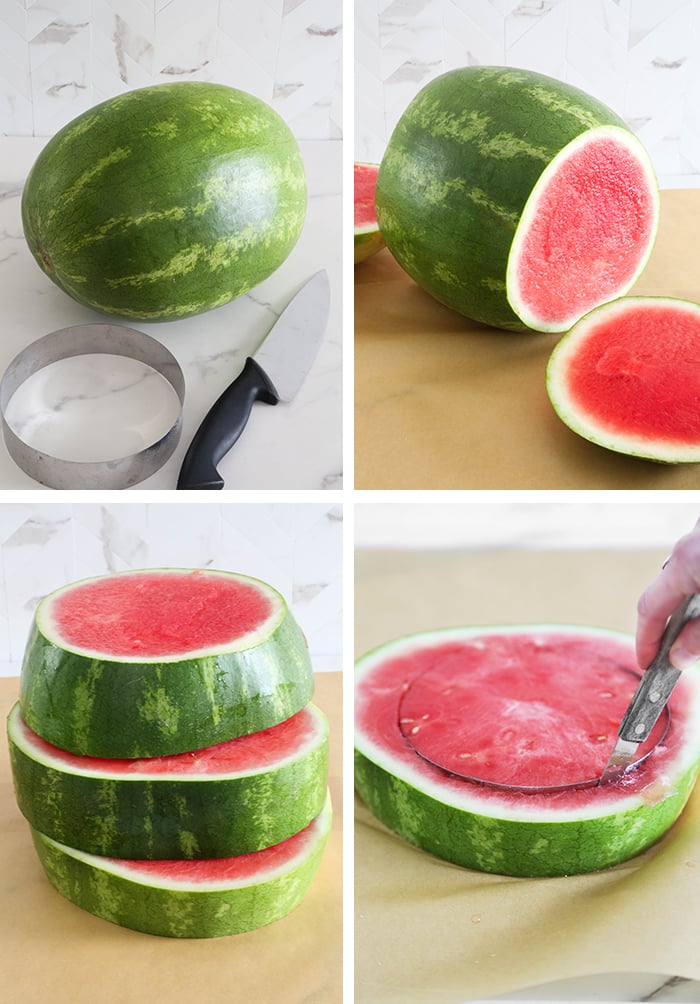
Start with a seedless watermelon that has a wide, rounded center. (I call it a “pot belly” shape.) A 7-10 pound watermelon works best for creating all the layers and decors you will need. Look for a watermelon that feels heavy for its size and has a creamy yellow field spot. A ripe watermelon will have the sweetest flavor and a firm texture for layering.
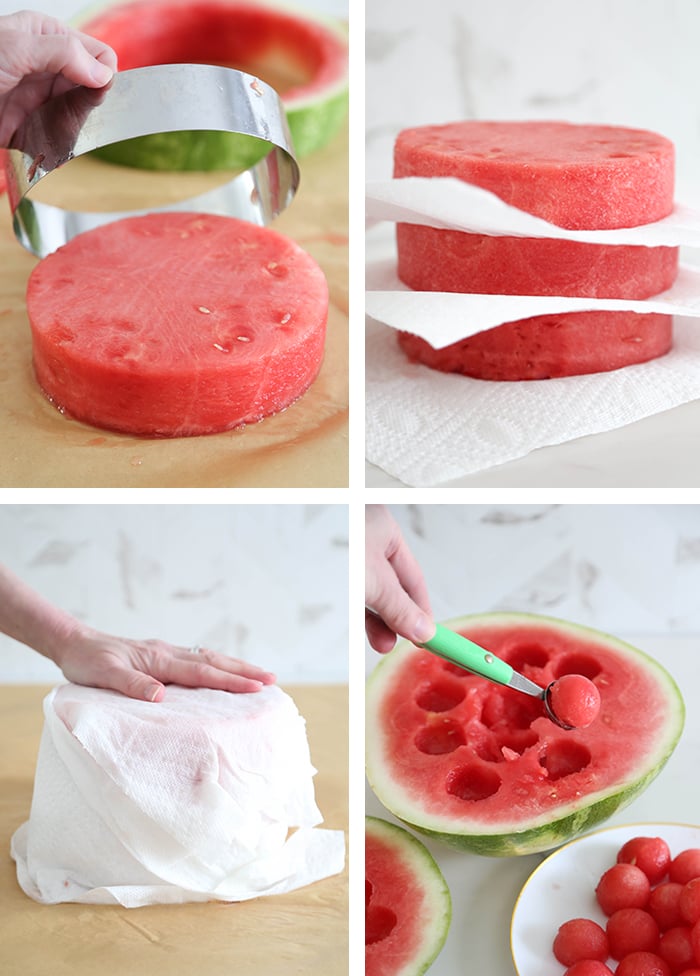
First, trim away the tapered ends of the watermelon. Next, cut the center section into three thick slices. Using a 6 x 2-inch pastry ring like a giant cookie cutter, press down into the center of each slice to create perfectly round cake layers. Because the watermelon slices will likely be thicker than the ring, press as deeply as possible and then use a small paring knife to finish the cuts. Save any watermelon flesh pieces and scraps for snacking on.
Tip: If you don’t have a pastry ring, use a 6-inch dessert plate as a template. Center the plate on the watermelon slice and cut around it with a sharp knife. Keep the knife straight as you cut so the sides remain even and cake-like.
Prep the Watermelon Layers
Once you’ve cut out the watermelon rounds, trim them to about 2 inches thick. Then place the layers between paper towels and gently pat them dry. This extra step removes excess moisture so the whipped cream sticks to the watermelon and the finished cake does not give off its juices.
The watermelon layers can be prepared a day in advance. Wrap them in paper towels, cover with plastic wrap, and refrigerate until you’re ready to assemble.
As for the leftover watermelon, I never let it go to waste. Use a melon baller to scoop out watermelon balls for decorating the finished cake. Any extras make a sweet snack for the cook!
Add the Whipped Cream and Berries
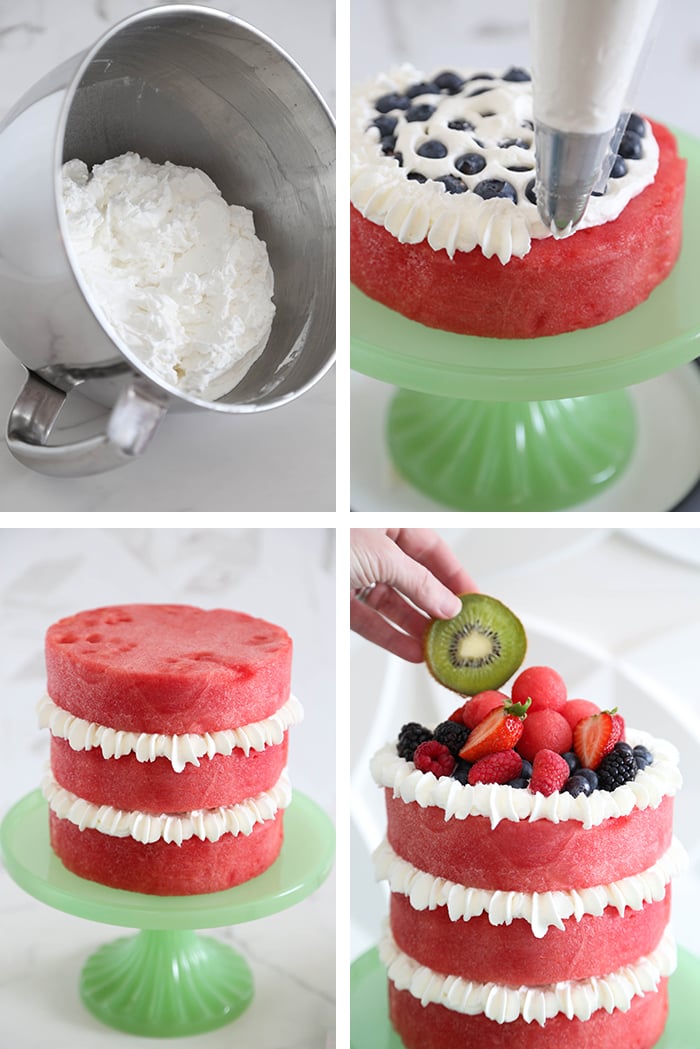
Whip the heavy cream until slightly thickened. Then gradually add the confectioners’ sugar and vanilla bean paste and continue whipping until stiff peaks form. The whipped cream should be thick enough to spread and pipe.
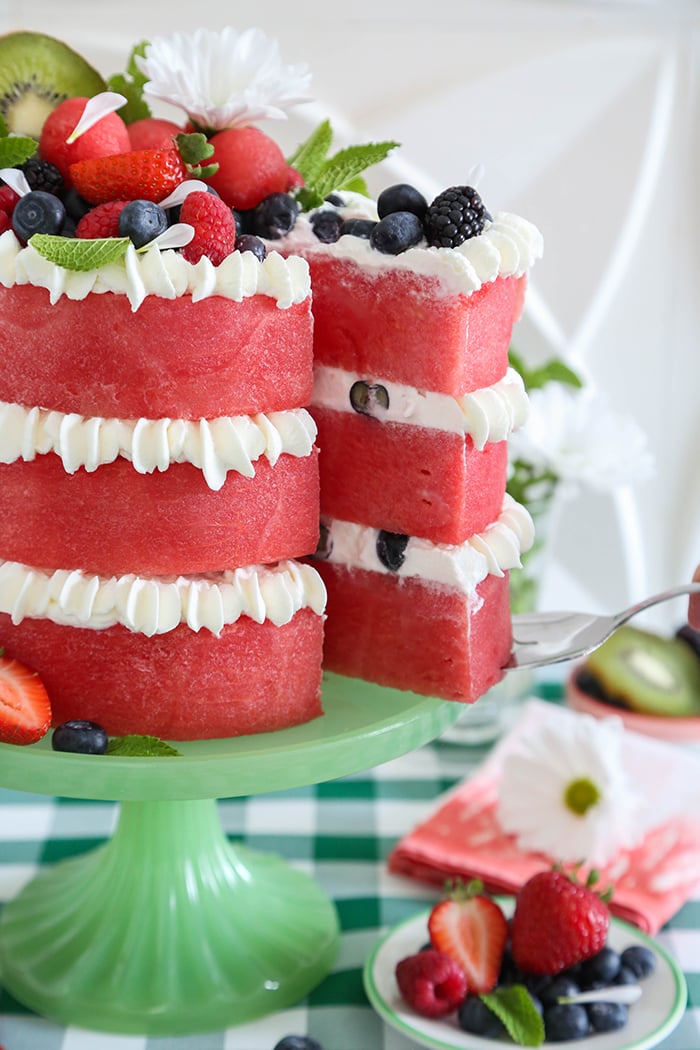
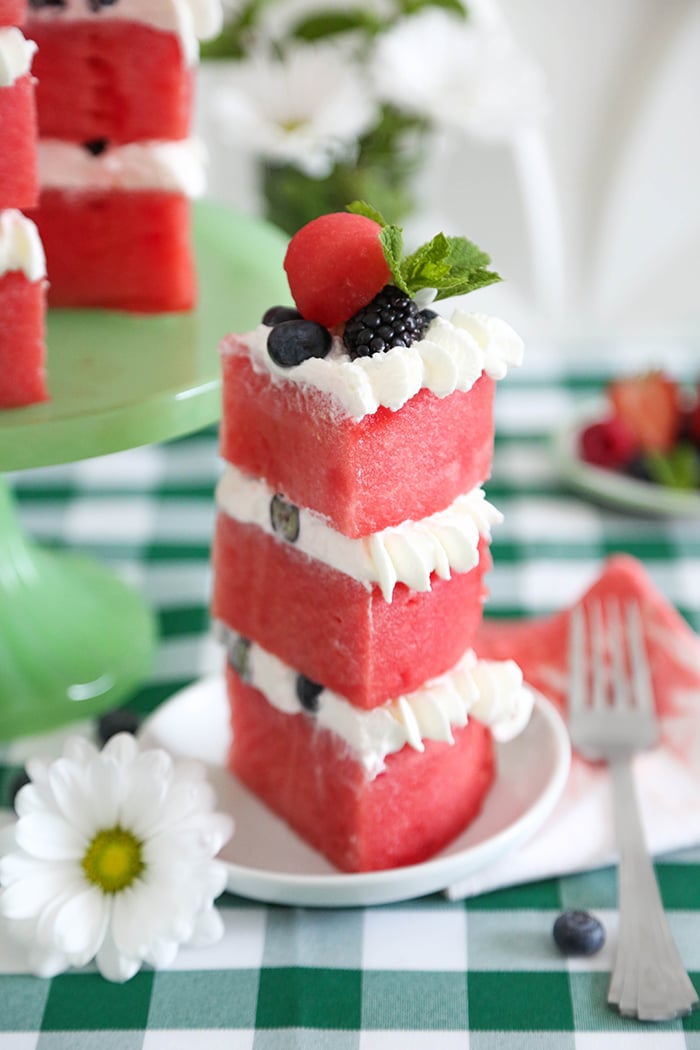
Spread a thin layer of whipped cream over the first watermelon layer, leaving about 3/4 inch uncovered around the edge. Arrange a single layer of blueberries over the whipped cream, then spread a little more whipped cream over the berries so just their tops remain visible. Pipe a border of whipped cream stars around the edge. Repeat the process with the second layer, then finish with the third watermelon round.
Why blueberries? They’re more than just decoration. Firm-ripe blueberries act as tiny supports between the watermelon layers, helping the cake hold its shape. Avoid soft or overripe berries, which can collapse under the weight of the watermelon.
Dairy-Free Alternatives to Heavy Whipping Cream
Coconut whipped cream is an easy alternative to heavy cream, but takes some pre-planning because the coconut milk needs a lengthy chill. Refrigerate 2 cans of (unshaken) full fat coconut milk until very cold (preferably overnight). Scoop out the solids from the can into the bowl of an electric mixer, then whip until soft peaks form. Sprinkle in the confectioners sugar then whip until stiff peaks form. (Save the liquid for your smoothies!)
You can also use dairy-free heavy cream such as Country Crock Dairy Free Whipping Cream.
Decorate the Layered Watermelon Berry Cake
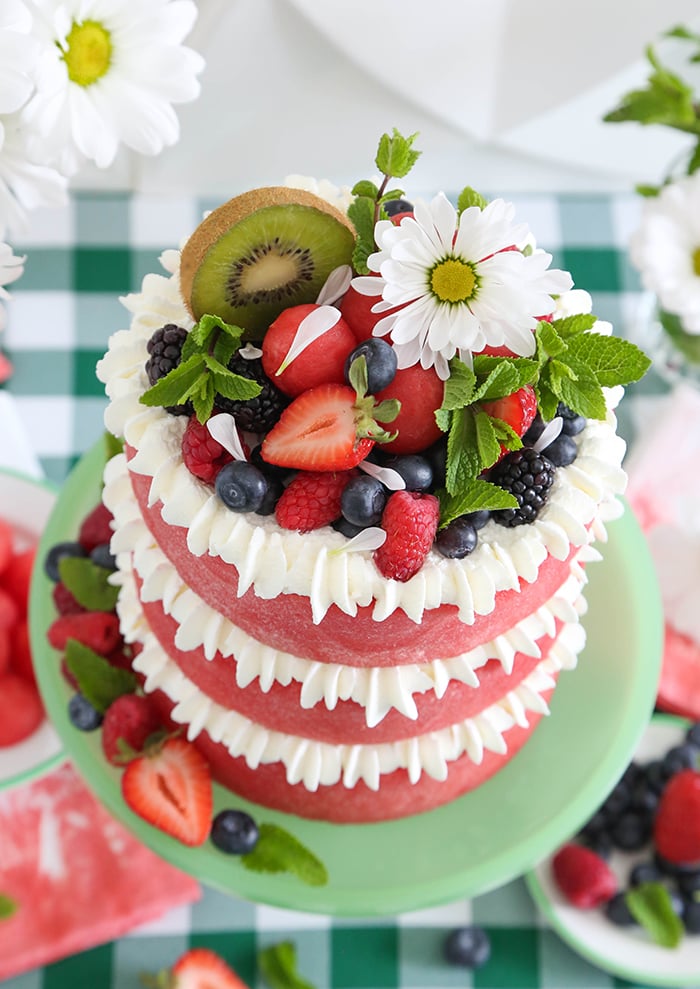
Now for the finishing touches! Decorate the top of the cake with some of the reserved watermelon balls, additional blueberries, and an assortment of fresh berries. This is the perfect place to get creative and use whatever summer fruit you have on hand. Any leftover fruit, such as the melon balls, can be served alongside the cake.
I couldn’t resist adding a bright green slice from the lone kiwifruit in my fridge for a pop of color. Fresh mint sprigs and food-safe flowers make beautiful additions, too. You could also give this cake a tropical makeover with pineapple, coconut, and colorful papaya. Or just add birthday candles!
Make Ahead and Storage
- The watermelon layers can be prepared up to 24 hours in advance. Wrap each layer in paper towels, then cover with plastic wrap and refrigerate until ready to assemble.
- For the freshest presentation, assemble the cake the same day you plan to serve it. Once assembled, the cake will hold its shape beautifully for several hours in the refrigerator without becoming watery.
- Any leftovers should be stored covered in the refrigerator and enjoyed within 1 to 2 days.
But How Does It Taste?
This was a frequent question on my original watermelon cake post from 2014. I understand some skepticism if you’ve never tried a watermelon cake before. But I’m here to tell you that it’s really nice! The watermelon provides juicy sweetness, while the whipped cream adds a creamy ambrosia note. The airy whipped cream perfectly compliments the tart berries.
Will a Watermelon Cake Become Watery?
This is by far the most common question I receive about watermelon cakes. The short answer is: not if you prepare it properly. Patting the layers dry with paper towels is the most important step because it removes surface moisture. Once assembled, the cake can be refrigerated for several hours without becoming watery.
In fact, I’ve found that the watermelon doesn’t noticeably release its juice until the cake is cut. At that point, you may see a small amount of liquid collect around the base of the cake or on the serving plate. That’s completely normal and doesn’t affect the whipped cream or the overall presentation. This cake holds up much better than most people expect.
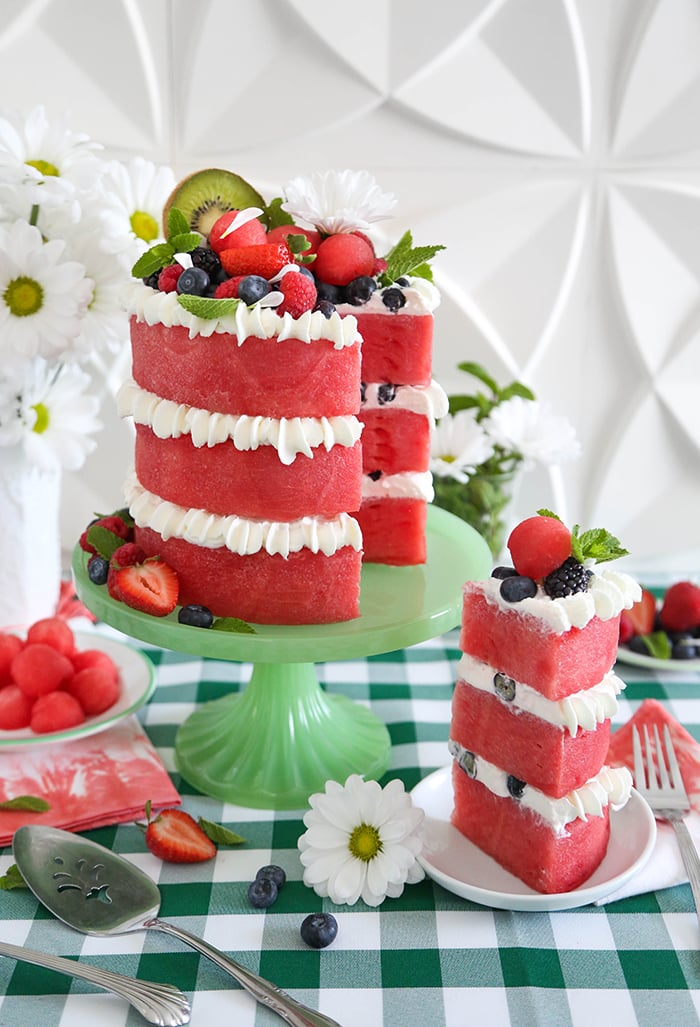
Summer in a Slice!
This Layered Watermelon Berry Cake is just made for summer soirees. It’s pretty enough for a garden party, but also fun for a cookout. Every slice is light and refreshing. It’s just sweet enough thanks to the whipped cream and berries. And if you’re entertaining, it’s a great gluten-free option that everyone loves.
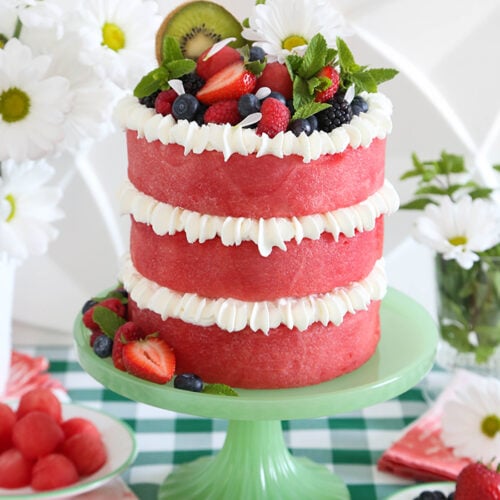
Layered Watermelon Berry Cake
Equipment
- Large chef's knife
- 6×2 inch pastry ring or 6-inch dessert plate (see notes)
Ingredients
- 7-10 pound seedless watermelon
- 2 1/2 cups heavy whipping cream or non-dairy whipping cream
- 1/2 cup confectioners’ sugar
- 1 teaspoon vanilla bean paste or vanilla extract
- 2 1/2 cups fresh blueberries firm-ripe, about 18 ounces
- 1 cup assorted fresh berries for decorating
- Fresh mint sprigs for garnish
Instructions
Prepare the Watermelon
- Trim away the rounded ends of the watermelon, leaving the widest center portion. Reserve the trimmed watermelon for later use.
- Cut the center portion crosswise into three thick slices.
- Using a 6×2-inch round pastry ring, cut a circle from the center of each watermelon slice. If the slices are thicker than the ring, press the ring in as far as possible, then use a paring knife to complete the cuts.
- Trim each watermelon round to approximately 2 inches thick.
- Place the watermelon rounds between layers of paper towels and gently pat dry. For best results, wrap the watermelon slices in paper towels and refrigerate for 30 minutes before assembling the cake.
- Use a melon baller to scoop balls from the reserved watermelon pieces. Refrigerate until ready to decorate the cake.
- Wash all of the berries and pat very dry. Set aside.
Make the Whipped Cream
- In a large mixing bowl, beat the heavy cream with an electric mixer on high speed until slightly thickened.
- Add the confectioners’ sugar and vanilla. Continue beating until stiff peaks form and the whipped cream is thick enough to spread.
- Transfer about half of the whipped cream to a piping bag fitted with a large closed-star piping tip.
Assemble the Cake
- Place one watermelon layer on a serving plate or cake stand.
- Spread a thin layer of whipped cream over the top, leaving about 3/4 inch uncovered around the edge.
- Arrange a single layer of blueberries over the whipped cream. Spread more whipped cream thinly over the berries so that just the tops of the berries are showing through.
- Pipe a border of whipped cream stars around the uncovered edge.
- Top with a second watermelon layer and repeat the whipped cream and blueberry layers. Pipe another row of stars around the edge.
- Add the final watermelon layer and repeat with whipped cream and blueberries.
- Cover the top of the cake with more whipped cream if desired, and pipe the star border around the top edge.
- Decorate with the reserved watermelon balls, fresh berries, mint sprigs, and edible flowers, if using.
- Refrigerate until ready to serve.
Notes
- The blueberries are an important structural element in this recipe. Use firm-ripe blueberries rather than soft or overripe berries so they can support the weight of the watermelon layers.
- The watermelon layers can be prepared up to 24 hours ahead. Wrap the rounds in paper towels, then plastic wrap, and refrigerate until ready to assemble.
- For a dairy-free version, use coconut whipped cream or a plant-based whipping cream substitute.
- If you don’t have a 6-inch pastry ring, place a 6-inch dessert plate on the watermelon slice and use it as a cutting guide.

So cool and refreshing! Perfect for hot summer weather!