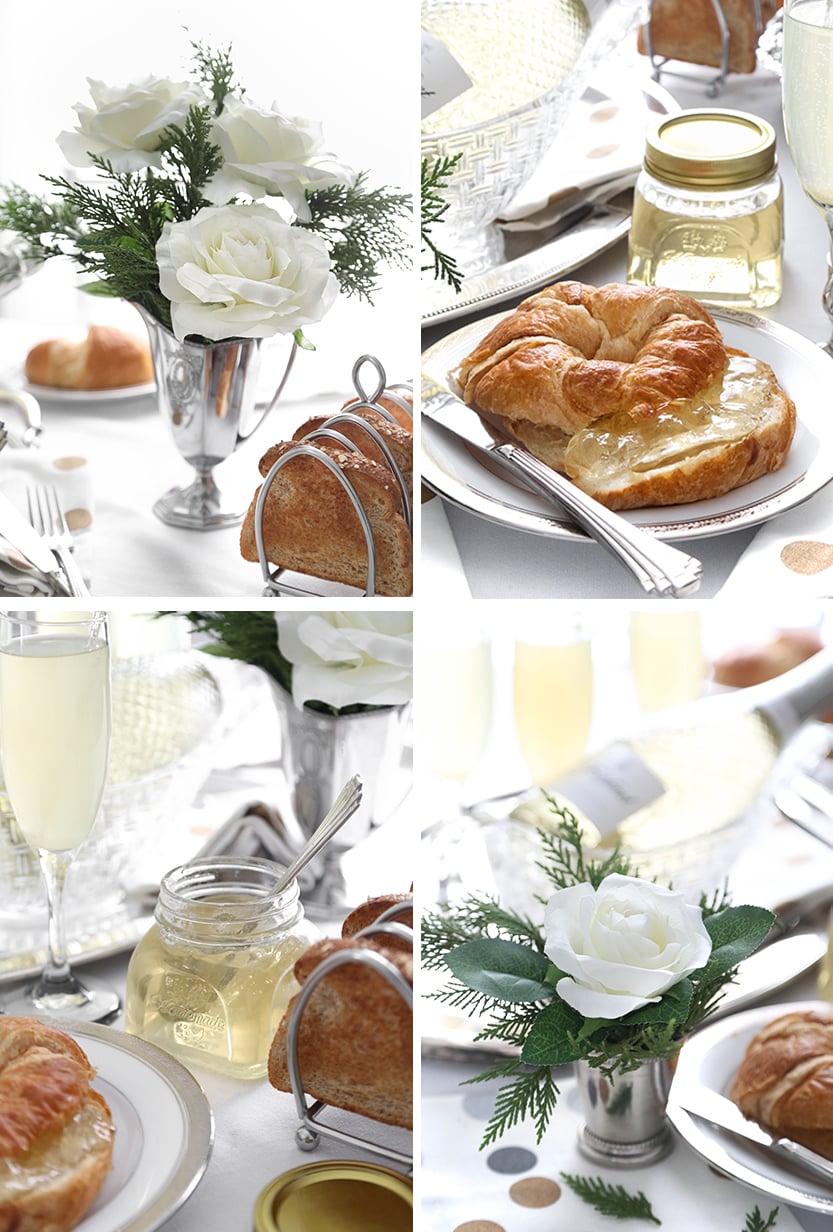
This Champagne Jelly recipe transforms your favorite sparkling wine into a delicious breakfast spread. Made with just 3 ingredients, it pairs perfectly with everything from croissants to charcuterie.

Say hello to my new favorite breakfast addition – Champagne Jelly! But it’s not just for breakfast. It’s right at home on a charcuterie board or as a glaze for the Christmas turkey or ham. The bubbly, wine-infused notes make it a versatile addition to almost any course.
It also makes a wonderful homemade holiday gift. I plan on sending jars home with my Christmas dinner guests, so they’ll have something special to help ring in the New Year. The best thing about this recipe is how easy it is to make with just 3 ingredients. It’s so simple! The best things usually are.
Champagne Selections
When using Champagne in baked goods or sweets, I usually recommend using a brand that you already love. But if you’re not sure where to start, here are a few things to consider.
- Budget: Champagne comes in a range of price points. While high-end Champagnes are best for drinking, you don’t need to break the bank for making Champagne Jelly. Choose an inexpensive bottle that is described as “fruity” or “citrus forward’ and preferably dry.
- Sweetness Level: Jelly, by design, is a very sweet condiment. Which means a lot of sugar is going into the pot to boil with the champagne. Dry sparkling wines have less sugar in them, and using them may help control sugar content and unmask nuanced flavors. However, most any champagne, prosecco, or white sparkling wine will work. But if you have a choice, look for medium-dry (brut) or dry (extra brut) sparkling wines.
- Brand Recommendations: My current personal favorites for baking and jelly making are J. Roget Brut ‘American Champagne’ ($10.99). A medium-dry sparkling wine with crisp fruit flavors. And Freixenet Prosecco ($11.99). An extra-dry Italian white wine with notes of apple and citrus. Its golden color makes a beautiful jar of jelly.
Sterilize the Jars
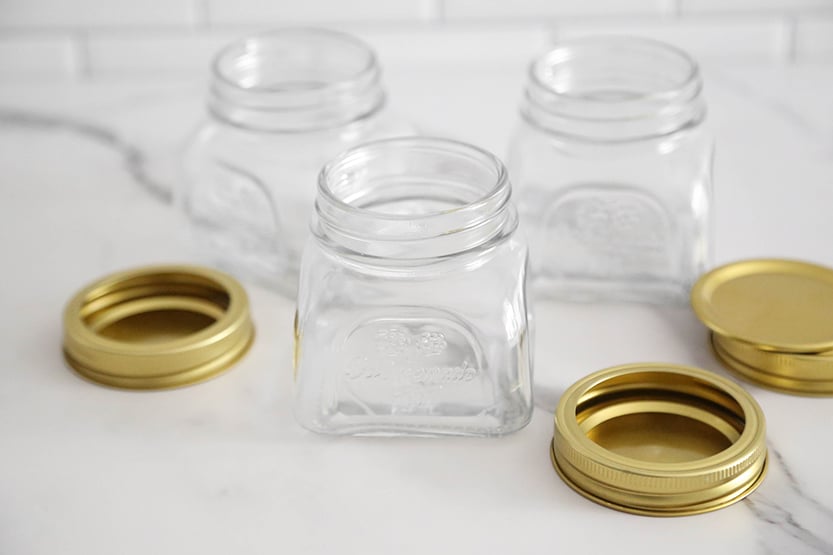
Top priority: ensure your canning jars are sterilized. Do this by washing them in hot, soapy water and then placing them in a large pot of simmering water for a few minutes. Keep the jars hot until you’re ready to fill them. Remove them from the boiling water and let them dry. This only takes a few seconds, because the hot water evaporates quickly. Don’t put the lids in the simmering water, though! It could melt the sealant. Just give those a good wash and set aside to dry.
Side note: If you’re a novice at canning, and would like to get started in earnest, then I use and recommend the Ball Blue Book Guide to Preserving. It’s the gold standard for proper technique and safety measures. Or certainly visit their Home Canning 101 page online, which is a free resource!
Three Ingredient Alchemy
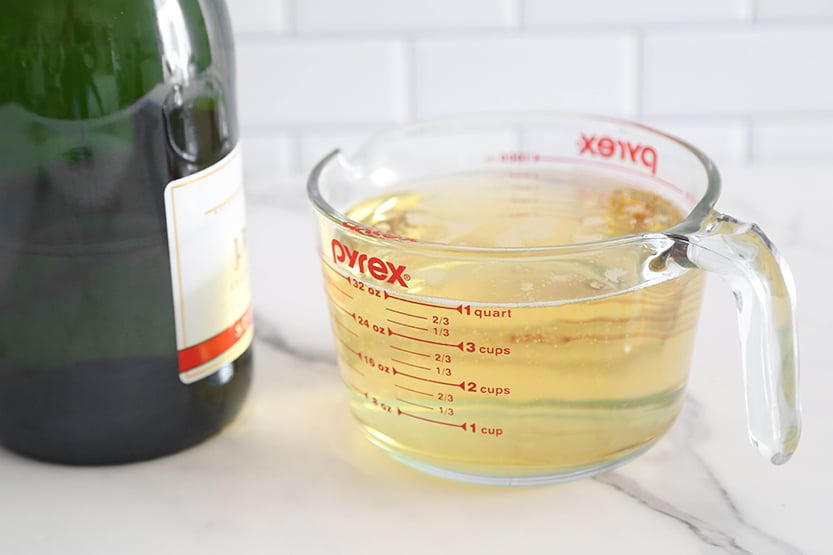
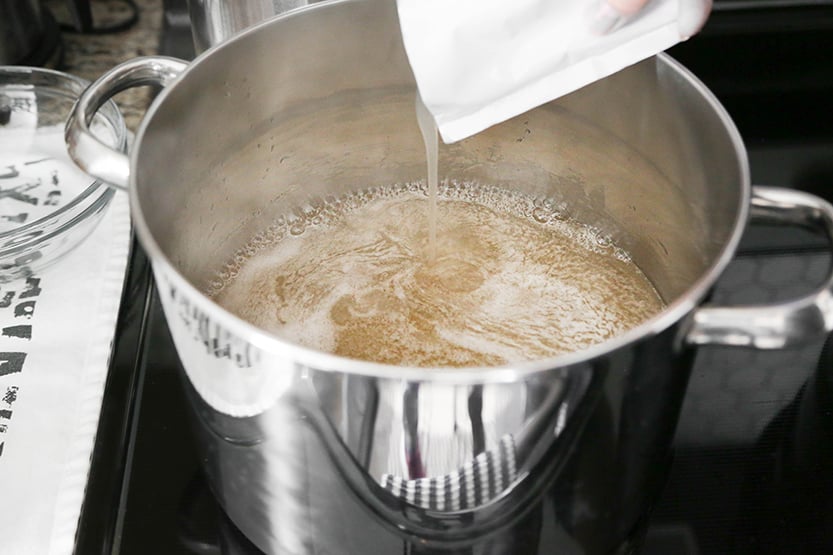
The beauty of this three-ingredient recipe lies in its simplicity. You’ll need 4 cups of champagne, 6 cups of sugar, and a box of liquid pectin (2 packets). Bring the champagne and sugar to a boil, then add the pectin and boil for 1 minute. It’s not only simple, but quick, too!
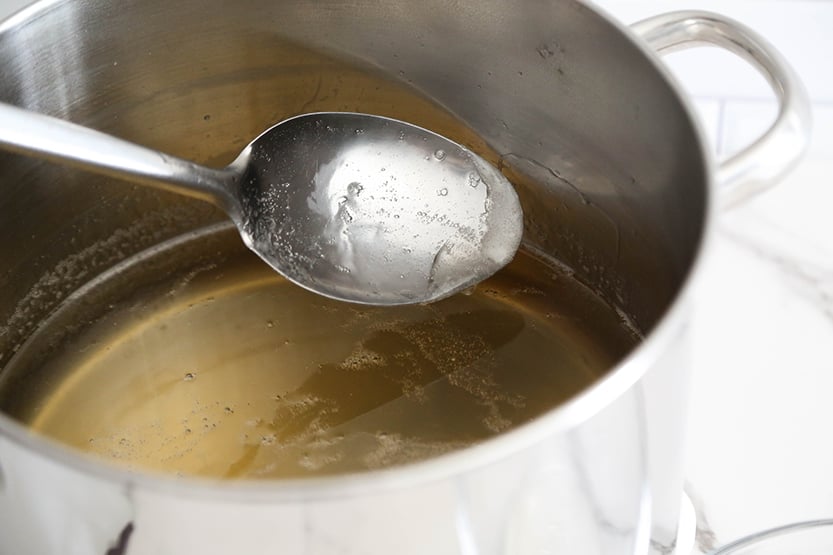
Skim the Foam
This recipe makes a remarkably clear jelly! But you may have a little foam on the surface of the jelly from the boiling process. Just skim it off to a small plate.
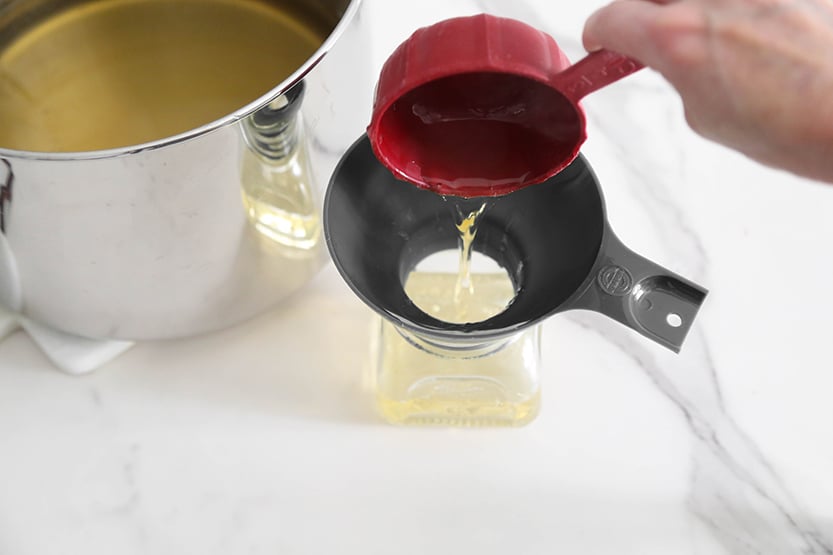

Fill the Jars
Set a canning funnel in the top of a jar and carefully ladle the hot Champagne Jelly into it, leaving about 1/4 inch of headspace at the top. Wipe the jar rims clean with a damp cloth to ensure a proper seal.
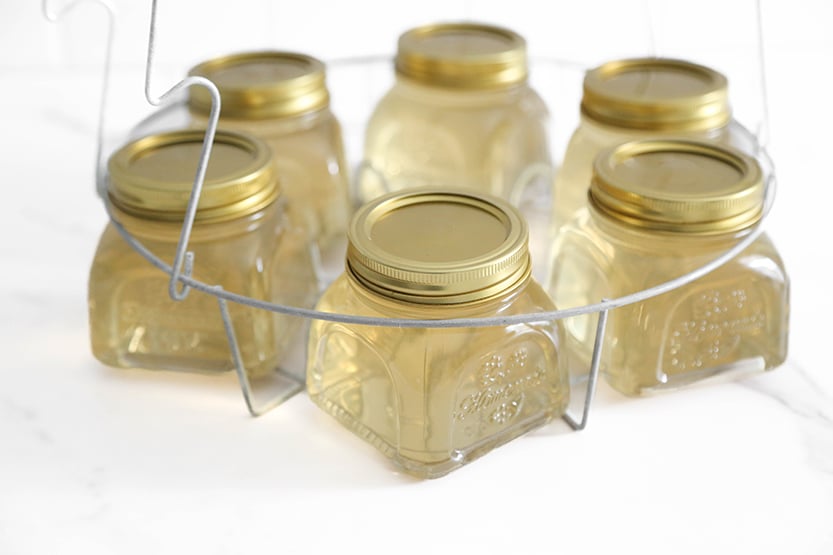
Process in a Water Bath – or Don’t!
Place the lids on the jars, and screw the bands on until they are fingertip-tight. Which means, don’t screw the lids on too tight! Process the jars in a boiling water bath for 10 minutes. Remove them and let them stand to cool. You should begin to hear the jars’ tell-tale ‘POP‘ that means it has sealed air tight.
You don’t absolutely need a water bath canner with a rack to process the jars in, but it helps. Alternatively, you can place the jars in a big stock pot of boiling water that covers the lids, and process for 10 minutes.

The Simplest Version
OR, you can just skip the water bath altogether. Just cook, pour in jars, and store the jelly in the refrigerator. The jelly will be refrigerator stable for 6 months. The sugar and refrigeration works in tandem to preserve the jelly for a long period of time. You can still give the jars as gifts – just be sure to clearly label “refrigerate” or “keep refrigerated“.
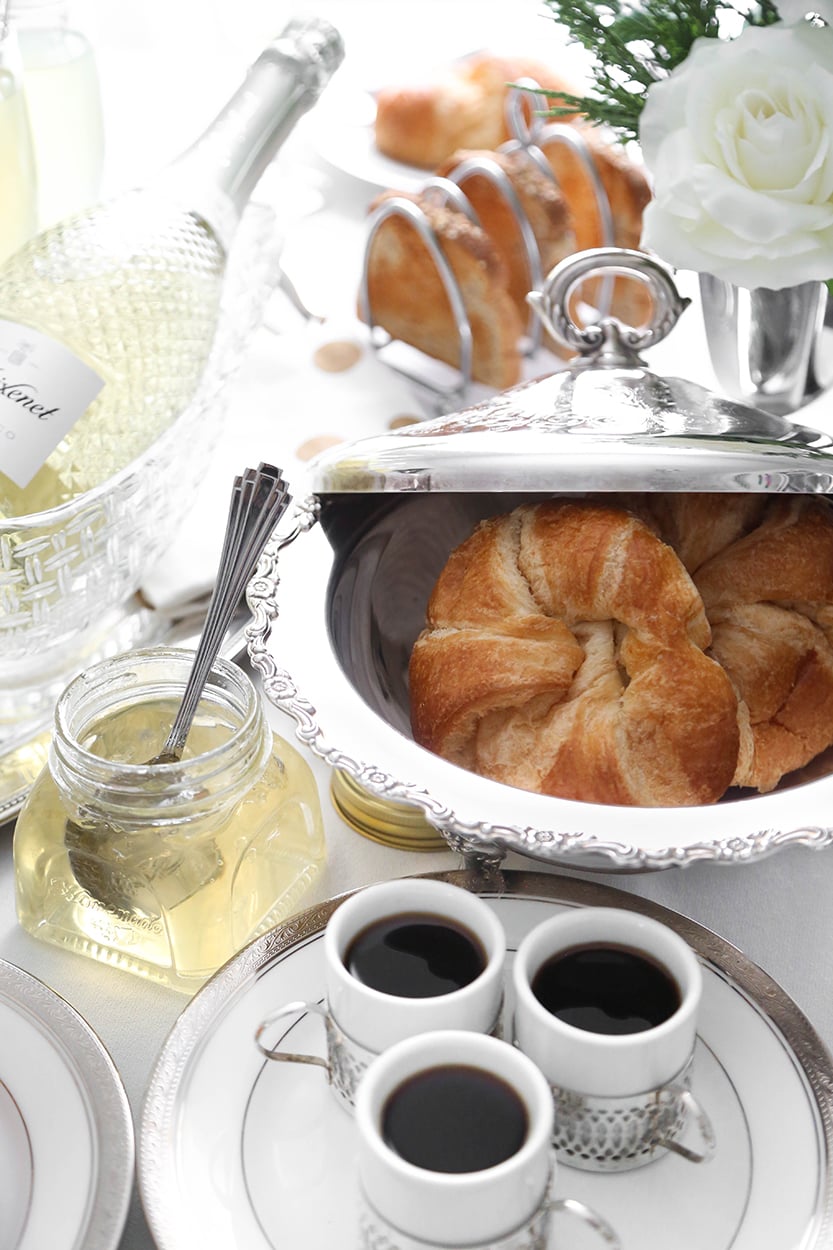

Ways to Enjoy Champagne Jelly
- Spread it on toast or croissants for a breakfast or brunch treat.
- Pair it with a variety of cheeses on your charcuterie board for a sophisticated sweet note that complements the savory elements. (I love this with Havarti cheese!)
- Use it as a glaze for poultry or pork dishes to add a touch of wine-infused sweetness to your main course.
- Warm it for 15 seconds in the microwave for the fanciest ice cream topping.
- Use it as a cake filling.
- Share it with friends and family as a homemade gift, perfect for celebrating special occasions or ringing in the New Year.

There’s nothing quite like sipping on a glass of sparkling champagne to celebrate a special occasion or to ring in the New Year. But I think turning your favorite champagne into a spreadable, edible treat is the next best thing! With its complex yet unmistakable grape notes, Champagne Jelly is a unique way to give any meal a sense of occasion.
Related recipe: Port Wine Jelly

Champagne Jelly
Equipment
- half pint jars with lids and rings 6
- canning funnel
- ladle
- Water bath canner optional
- Canning jar lifter optional
Ingredients
- 6 cups of granulated sugar
- 4 cups of champagne preferably dry
- 6 oz. liquid fruit pectin 1 box or 2 pouches
Instructions
- In a large pot, combine the sugar and champagne. Heat the mixture over high heat until it reaches a full, rolling boil, stirring frequently. Stir in the liquid fruit pectin and continue to boil for 1 minute while stirring constantly.
- Remove the pot from the heat and, if necessary, skim off any foam that may have formed on the surface. Carefully transfer the hot mixture into sterilized half-pint jars, leaving a 1/4-inch headspace. Wipe the jar rims clean, center the lids on the jars, and screw on the bands until they are fingertip tight. (Don’t over-tighten!)
- Place the filled jars into a water bath canner with simmering water, ensuring that they are completely submerged. Bring the water to a boil and process the jars for 10 minutes. After processing, carefully remove the jars from the canner and allow them to cool.
Notes
-
- Spread it on toast or croissants for a breakfast or brunch treat.
-
- Pair it with a variety of cheeses on your charcuterie board for a sophisticated sweet note that complements the savory elements.
-
- Use it as a glaze for poultry or pork dishes to add a touch of elegance to your main course.
-
- Warm it in the microwave for an ice cream topping.
-
- Use it as a cake filling.
-
- Share it with friends and family as a refined homemade gift, perfect for celebrating special occasions or ringing in the New Year.

What a great gift idea! Question-could you use sparkling white grape or apple juice for a non-alcoholic version and if so, would you decrease the amount of sugar?
Hi Cindy,
You could use sparkling grape juice, but don’t use less sugar. The granulated sugar helps the jelly to set. For a less sweet version, you could use 100% white grape juice with no sugar added. I believe Santa Cruz brand produces an organic variety. You could swap in the grape juice for the champagne and keep the same amount of sugar. The carbonation disperses during boiling, so you wouldn’t necessarily need a sparkling juice.
Can this recipe be halved if needed?
Yes! This recipe halves well.
May I use Sure Jell in the box? If so, how many/much please? Thank you.
Hi Elle,
Yes! You can use powdered Sure Jell, but you’ll prepare the ingredients a little differently. First, you’ll need just one package or 4 tablespoons of the powdered pectin. Combine it with the champagne or sparkling wine in a pot and boil for one minute stirring constantly. Then add the sugar and simmer, stirring frequently until the sugar is dissolved. Then you can proceed with step 2 and follow the rest of the recipe as written.